| /Home /Professional /Papers /ColorHCW /HCW-Modify |
Description Revised 2015-06-19
| In this description you may find items marked in GREEN that are recent changes. You may also find items marked in OLIVE that are not in the current version but are planned for a later version. You may also find items marked in RED that only apply to the current version and will be changed in a later version. |
Download Program and source
Contents |
Notes and Release HistoryKnown errors to be fixed:
|
IntroductionThe HCW-Modify program modifies graphics files using the HCW color representation described in the ColorHCW.html document. The program was originally developed for simple graphics files specifically to correct problems with JPEG artifacts. Additional functions were added as needed. The original program was a simple console application which only had the limitation of not being able to see the graphics as they were being modified. The Windows Forms version of the program allows easy visualization of changes and comparison with the original graphic.The program was originally designed and used for clip art composed of solid colors and gradients. The pictures had black edging around individual components similar to stained glass. Other types of graphics may not work as well. The program is slowly evolving to be a more complete image editing program but is not ever intended to replace even a simple program like Paint. This program only provides certain specific functionality not found in Paint or other free and simple graphics editors. |
Installing the ProgramProgram installation is recommended for an HCW-Modify directory under the Documents directory for an individual user. The Program files directory can be used for an administrator install for all users. You can place a shortcut in the SendTo directory for easy access to the program. The program is completely stand-alone so a simple copy is all that is needed to install. You can carry it on a USB stick and use anywhere. I do not provide an install program because I want you to know for absolute certain exactly what is required to use the program. Uninstall is very simple. Erase the program! Setup programs mysteriously make unknown changes to your computer. I won't even change the registry for you. I provide the complete source so you can know for certain exactly what the program does. Compile it for yourself, if you are able. Examining the code is not easy but it is available, if it is a concern to you. By these methods, you can trust the software. There is so much out there that is not trustworthy. You don't have to trust me. Full disclosure is the best trust there is. The program is compiled with the .NET framework version 3.5, which is included automatically with the Windows 7 OS. The program has only been well used and thoroughly tested with the Windows 7 OS. The program has only been used a little with the Windows 8 OS (Yuck!). The program has not been used or tested with Windows Vista or XP. Unfortunately, the .NET framework version 3.5 is not installed in Windows Vista or XP so you will need to install it to use the program in Windows XP. There are likely to be issues with the program. I don't use XP anymore so I won't be able to help you. |
Using the CodeI am providing the complete VS2010 C# project zip file with the executable and the complete source code for the HCW-Modify program for those who enjoy software code. I hope you find the source code instructive for picking up some ideas. I have learned a lot by examining the code of others. I hope examining my code will be useful to you. |
Main MenuThe main menu contains the menu groupings for all the functions performed by the HCW-Modify program. |
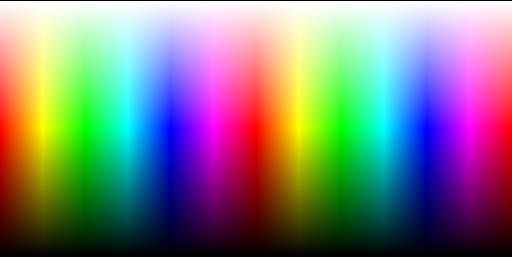
File MenuThe file menu contains the typical functions for handling file operations and exiting the program.NewNew standard file images are created with this option. These images may be edited and saved the same as if the image had been created by an open.If the current image has been modifed, you will be offered the option to save the image to a file before the tool performs its function. If the save is cancelled, the modified image will be lost. When the window is closed, you will be offered the option to save the image to a file. HCW PaletteThis standard image is a rectangular projection of the HCW hexcone. This shows the color wheel as a full range of primary hues in the horizontal dimension with increasing White values going up in the vertical dimension and decreasing values of Chroma going down. The image is also reflected in the vertical dimension. Refer to the ColorHCW.html section on Visual Representations for a description of this type of representation. HW PaletteThis standard image is a hexagonal projection of the HCW hexcone. This shows the color wheel as a full range of primary hues in the outside dimension with increasing White values going toward the center. Refer to the ColorHCW.html section on Visual Representations for a description of this type of representation. HC PaletteThis standard image is a hexagonal projection of the HCW hexcone. This shows the color wheel as a full range of primary hues in the outside dimension with decreasing Chroma values going toward the center. Refer to the ColorHCW.html section on Visual Representations for a description of this type of representation. Hex SunburstThis standard image is a flat/wide hexagonal projection of the HCW hexcone. This shows the color wheel as a full range of primary hues in the outside dimension with increasing White values going toward the center. Refer to the ColorHCW.html section on Visual Representations for a description of this type of representation. Round SunburstThis standard image is a round projection of the HCW hexcone. This shows the color wheel as a full range of primary hues in the outside dimension with increasing White values going toward the center. Refer to the ColorHCW.html section on Visual Representations for a description of this type of representation. Hue GradientThis standard image is a gradient bitmap of the current color. This bitmap can be used with matte masks. A dialog is displayed requesting the range of colors for the gradient. OpenAn open file dialog is shown to select the graphics file for processing. If a file is already open and the image has been modifed, you will be offered the option to save the image to a file. If the save is cancelled, the modifed image will be lost.Two windows are displayed which are labelled "Original Image" and "Unmodified Working Image". The original image is always displayed to allow comparison with the results of any editing changes. The working image is initially a copy of the original and shows the results of any editing changes. The window title changes to indicate the last editing operation performed. Revert to OriginalThis option is not enabled unless there is a file open. The working image will be reverted to a copy of the original image. If the image has been modifed, you will be offered the option to save the image to a file. If the save is cancelled, the image will still be changed.CloseThis option is not enabled unless there is a file open. If the image has been modifed, you will be offered the option to save the image to a file.Save AsThis option is not enabled unless there is an image displayed. A dialog is displayed suggesting a file name for the image. The file name defaults to the input file name with "-2" appended in the same directory. You are not allowed to save over the original file. You may change the name and directory as desired.ExitThis option will exit the program. If the image has been modifed, you will be offered the option to save the image to a file. If the save is cancelled, the program will still exit and the modified image will be lost. |
Edit MenuThe various functions to modify the image are grouped under the edit menu. This menu will not be enabled unless there is an image to be modified.AlphaThis option will create a transparent alpha value for all Black areas. I have only been able to create files demonstrating transparent function with PNG and TIFF at this time.WhitenThis option will set all nearly white pixels to absolute White. This is helpful when you wish a completely White background such as for transparent pasting. You are prompted for a White cutoff level to consider White. Any White value at or above this level will be set to absolute White. The allowed range will lose bright colors at low values. Only nearly white pixels next to an absolute White pixel will be changed. This command repeats until no more pixels are changed.BlackenThis option will set all nearly black pixels to absolute Black. This is helpful when you wish a completely Black background such as for transparent pasting. You are prompted for a Chroma cutoff level to consider absolute Black. Any Chroma value at or below this level will be set to absolute Black. The allowed range will lose dark colors at high values. Only nearly black pixels next to an absolute Black pixel will be changed. This command repeats until no more pixels are changed.DespeckThis option will examine the image and Whiten or Blacken any specks in a whitened or blackened area. This function is expected to be used in a somewhat high-resolution image after Whiten or Blacken but before Edge. You may specify the definition of a speck in terms of how many Black or White pixels on a side. The range is 5 - 8 pixels. A speck will be set to near black or near white. Blacken and/or Whiten before and after despeck is normal.A speck defined as 5 or more pixels will cause a single pixel rounding of a square corner. Narrow lines with a width of three pixels or less may also be shortened slightly, particularly when close to vertical or horizontal. This is particularly true if the function is repeated. A very narrow line of one or two pixels may disappear completely. EdgeThis option is primarily useful after the Whiten or Blacken command to maintain an edge which is not pure white or black around every part of the graphic. This assists with transparent pasting. These "edges" are a continuous band which can also be pasted or transformed to another color for special border effects.You are prompted for the width of the edge in pixels. Each pixel outline is one (nearly? invisible) level of white or black more to distinguish it from White or Black. For example, a single edge would have an RGB color value of (254,254,254) for nearly White and (1, 1, 1) for nearly Black. Toggle B/WThis option makes it easy to see changes from the Whiten, Blacken, and Edge commands. All occurences of Black are changed to White at the same time all occurences of White are changed to Black. The option is used twice to return the image to its normal background.CompressThis option removes intermediate values which may not contribute to the image and result in a more compressible file. You are prompted for the modulus of intermediate values to remove. The minimum value of 2 truncates all odd values to even values (%2 or mod 2), a value of 3 is (%3 or mod 3), and so on. A compression value of 4 or mod 4 is nearly indistinguishable. Higher values will produce banding effects in color gradients.Gradient SmoothA gradient smoothing pass compares three consecutive non-edge pixels in horizontal, vertical, and crosswise directions. If the two slopes from the center pixel diverge more than two units in Red, Green, or Blue values from the same tilt, two units are removed from the center pixel with one each added to the outside pixels. This change is kept small to avoid disruptive shifts but can be repeated many times. You are prompted for the number of smoothing passes to repeat.HCW Transform DialogClicking this option will popup a modal dialog box which will allow you to specify the HCW selection values to select pixels in the source range and to specify the target range to transform each selected pixel to a target value. This function is straightforward and well tested for Hue transforms. It is still struggling to make rational Chroma and White transforms.The simplest example to ilustrate this function is a Hue only change. The target values for Chroma/White are set identical to the selection values. For example, to change all pure yellow values to pure blue. The hue selection range would be 600-600 and the target range would be 2400-2400. Since most images have a range of yellows you may wish to change everything near yellow to near blue. An example is a hue selection range of 580-620 and a target range would be 2380-2420. You may wish to change everything near yellow to pure blue. An example is a hue selection range of 580-620 and a target range would be 2400-2400. You could also change everything near yellow to pure yellow. An example is a hue selection range of 580-620 and a target range would be 600-600. The value for hue is actually a continuous range from 0 - 3599 which is immediately followed by 0. If you wanted to indicate a range of red values then the starting number is actually larger than the ending value of the range. Near red is therefore approximately 3580-20. This is called a wrap-around range whenever the lower value is higher than the upper value. A selection range excluding everything except near red would be 20-3580. A selection range including everything except near yellow would be 620-580. Chroma/White transforms are much more complex. The HCW Transform Dialog has a selection to limit transforms to Hue/Chroma or Hue/White. The interactions of Chroma/White are too complex to allow both to occur at the same time. The complexity occurs because Chroma/White values are not independent. Unlike Hue, the values for Chroma and White do not wrap around. It means exactly the same thing whether the lower value is higher than the upper value or not. When a Hue/Chroma selection is chosen the White target is set to 0 and is ignored. When a Hue/White selection is chosen the Chroma target is set to 255 and is ignored. This is necessary because the desired target range for the White values must be less than or equal to the Chroma values. There are a large number of possibilities available with this function. Perform TransformClicking this button will perform the HCW transform according to the specified selection and target ranges.The Chroma and White values have an interaction which is not obvious. Changing one of the Chroma or White values has an effect on the other value. The range of the White value is limited by the Chroma value. Therefore, changing one without changing the other causes some visual distortions of color. The program automatically compensates and scales for this distortion. The scaling is done according to the actual Chroma and White values of each pixel not according to the Transform values. For example, If you wanted to make an image lighter you would want to transform the White values to a higher range. I find this useful when compensating for printing a video image. Bright colors appear darker when printed. I use a selection range for White of 0-255 with a target range of 64-255. Values between 0 and 255 are scaled to be between 64 and 255. This does cause a problem with black or near black. Therefore, I use a selection range which excludes blacks. The problem is that colors tend to get washed out and shift toward a gray scale, if you do not adjust the chroma upward to compensate for an increase in the white value. A similar problem occurs with a decrease of the white, increase in the chroma, or a decrease in the chroma. Example scaling of individual pixel values:
Transform Option SettingsThe five HCW options provide the ability to view and set HCW selection values. The Current Color option is only used for reference. The rest are used for the HCW Transform editing function. Click on any selection to change its value with the Color Picker. Each button displays its current setting with three color blobs.
Current H: ??? C: ??? W: ???This is the Current selection HCW values. These are usually picked from the graphic as a reference value. The Current color is only used for reference. Selection Lower H: ??? C: ??? W: ???This is the lower boundary of the selection region for selecting the source HCW value range. Selection Upper H: ??? C: ??? W: ???This is the upper boundary of the selection region for selecting the source HCW value range. Target Lower H: ??? C: ??? W: ???This is the lower boundary of the target region for changing the target HCW value range. Target Upper H: ??? C: ??? W: ???This is the upper boundary of the target region for changing the target HCW value range. Set to Current OptionsThe four option buttons provide the ability to set the HCW options to the Current HCW value.Set to Default OptionsThe four option buttons provide the ability to set the HCW options to a Default value. The default values will select everything except Black and White and make no change in values for the perform transform.The lower default value is: H: 0 C: 1 W: 0 The upper default value is: H: 3599 C: 255 W: 254 Example transform optionsThese example options will select every pixel which is near green and change it to blue without changing the Chroma or White value:
GIF Palette Color ConversionThis option converts all color values to the nearest color found in the standard Windows 7 GIF palette without dithering. This will be needed before saving to GIF format unless you prefer the standard color dithering. Windows 7 Paint GIF Palette Standard values
GrayscaleThere are five Grayscale conversion functions.Chroma to WhiteThis grayscale conversion method copies the Chroma value to the White value and sets all values to the result for each pixel in the image. This produces a grayscale which loses all indication of Hue and White values. It turns all primary or pastel colors white. This might be effective on a very dark image.White to ChromaThis grayscale conversion method copies the White value to the Chroma value and sets all values to the result for each pixel in the image. This produces a grayscale which loses all indication of Hue and Chroma. It turns all dark colors black. This might be effective on a very light image.OverlappingThis function adds together 30% of the red value, 59% of the green value, and 11% of the blue value and sets all values to the result for each pixel in the image. This produces a nice smooth grayscale conversion.ReversibleThis function severely restricts colors to bits which is a crude grayscale but has the unique function of being partially reversible. This creates an interesting visual effect.UndoThis function performs the reverse of the reversible grayscale and partly restores the original color with a certain degree of accuracy. This also creates an interesting visual effect.MonochromeThe Monochrome conversion requests a white level at which to select whether the color is converted to white or black for each pixel in the image.Fill GradientThis function prompts on the status line for you to click on an area to select a center location for the fill. You are prompted for the color to fill from the left-center with a gradient color. The complete contiguous area of the same color is filled with the current color as a gradient. You are then prompted for the final White value for the fill to the right edge. You are then prompted for the final Chroma value for the fill to the top and bottom edge. The area is assumed to be a basically simple geometric shape from square to oval or circular. The fill will not track well around edges. TextThis function prompts on the status line for you to click on a spot to select a starting center location for the text. You are then prompted for a text string to be blended into the graphic at your specified location with your specified font, color, and rotation. | |||||||||||||||||||||||||||||||||||||||||||||||||||||||||||||||||||||||||||||||||||||||||||||||||||||||||||||||||||||||
View MenuThe View Menu provides any options available to change the way the program displays on the screen.Status BarThe optional display of the status bar is selected.Display Pixels ChangedThis option controls the display of the "Pixels Changed" popup box. When checked, the box will display the number of pixels changed after any editing operation. |
Tools MenuVarious tools are available under this menu.Color PickerThe color picker is a display of the currently selected color and its associated HCW and RGB values. These can be modified to select different colors. The color picker is automatically displayed when you click on either the original or the modified image. The color under the tip of the mouse pointer becomes the selected color.The color picker is also shown to select the input value to certain editing functions. The color picker is a sophisticated and valuable tool to become familiar with the results of changing and converting HCW and RGB values. There are numerous controls to adjust the color in many ways. There are also numerous indicators of information about the currently selected color. The bottom right corner shows a swatch of the current color. Available colors are shown in the other bitmaps. The numeric value of the Hue, Chroma, and White values are indicated at the bottom left. The Red, Green, and Blue equivalent values are also shown. The position of the sliders also indicates the current values graphically. The primary color section control is the large bitmap, which shows a full palette of all the pure colors. The tints (maximum Chroma with increasing White) are shone in the top half and the shades (Minimum White with decreasing Chroma) are shone in the bottom half. Tones will require separate adjustment of chroma and white. Clicking on the palette will immediately select that color. Changing any control setting will immediately update all indicators. The Hue, Chroma, and White sliders will graphically select the appropriate values. Remember that the White slider and any control for the White value can never select a value higher than the Chroma value. Selecting a low value for the Chroma will automatically limit the White value. The large Buttons step through some standard numeric values. The Hue cycles 60 degrees (600 centidegrees) through the color wheel with each click. The other buttons step up by 32 degrees. The small buttons count up or down by 1. You can also just enter a numeric value. There are two special checkbox controls to lock the Chroma and White ratios. Locking the Chroma ratio will cause the White value to be changed at the same time the Chroma is changed to maintain the same ratio relative to the minimum value. Locking the White ratio will cause the Chroma value to be changed at the same time the White is changed to maintain the same ratio relative to the maximum value. Memory UsedThis option will perform a garbage collection and display the amount of dynamically managed memory used. This is not the same as the total amount of memory used by the program. In fact it is far less. Primarily it is the amount of memory used to hold the open image and its bitmaps.Analyze HCW DistributionThis option will display three graphs of the distribution for the Hue, Chroma, and White levels in the modified image. Near Black (Chroma: 0 - 5) and near white (White: 250-255) values are removed in the Hue graph. Chroma: 0 - 1 and White: 254-255 values are clipped in the other graphs. All vertical distributions are scaled from 0 to 255. Horizonal grid lines indicate intervals of 16. Vertical grid lines indicate intervals of 8. Hue values are grouped by degree. Analyze Select HueThis option will display three graphs of the distribution for the Hue, Chroma, and White levels for the values within a degree of the hue for the currently selected color in the modified image. Near Black (Chroma: 0 - 5) and near white (White: 250-255) values are removed in the Hue graph. Chroma: 0 - 1 and White: 254-255 values are clipped in the other graphs. All vertical distributions are scaled from 0 to 255. Horizonal grid lines indicate intervals of 16. Vertical grid lines indicate intervals of 8. Hue values are grouped by centidegree. |
Windows MenuThis menu contains options to control the placement and display of the MDI child windows.CascadeDisplay all open windows in a cascade.Tile VerticalDisplay all open windows tiled verticallyTile HorizontalDisplay all open windows tiled horizontallyClose AllClose all open windows.If the current image has been modifed, you will be offered the option to save the image to a file before the window is closed. If the save is cancelled, the modified image will be lost. |
Help MenuThis menu contains options for help and program information.Online ContentsThis option will open the web site "http://www.FrankTClark.us/Professional/Papers/ColorHCW/HCW-Modify.html" which contains the online version of the documentation for the current version of the program.This web page may be saved to the "HCW-Modify.html" file in the directory with the program. This updates the Local Contents. Links from the page will fail unless additional pages and images are copied to the directory from the website. Local ContentsThis option will open the local web file "HCW-Modify.html" which contains the local version of the documentation for the program. The file is expected to be in the same directory as the program file. Links from the page will fail unless additional pages and images are copied to the directory from the website.This is useful for when you are not connected to the Internet. This is also valuable to maintain an old version of the help which matches an older version of the program. AboutThis option displays the program version number and other information. |
|
Revised 2015-02-15 |